Step-by-Step Guide: Installing WordPress Locally on Your PC
April 2, 2024
Unlocking Efficiency: The Top AI Tools You Need in Your Arsenal
April 16, 2024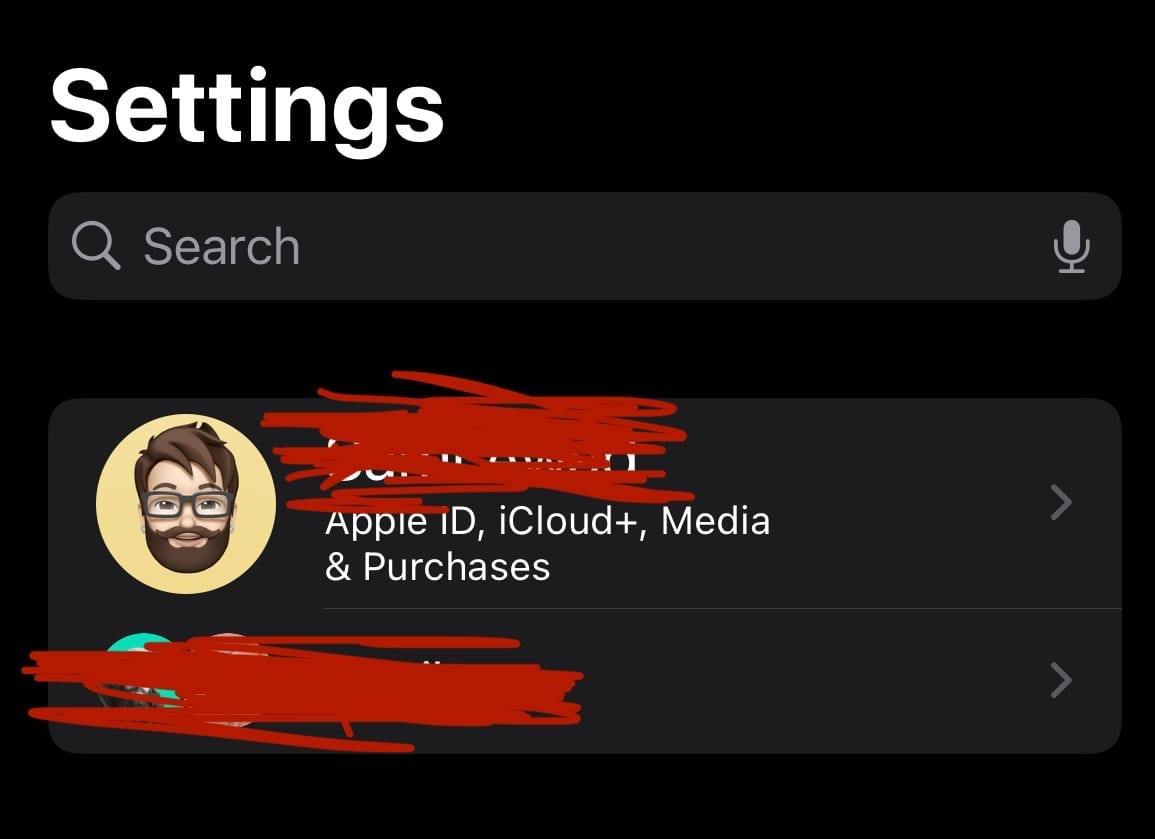
If you’re considering changing the email linked to your Apple ID account for any reason, the initial step involves unlocking your account. This process ensures that you have full access and control over your account settings before making any modifications.
In this guide, we’ll walk you through the step-by-step process of changing the email associated with your Apple ID. Whether you’re looking to update your contact information, improve security, or simply prefer using a different email address, we’ll provide clear instructions to help you navigate this procedure effortlessly. By following these steps, you can ensure that your Apple ID reflects your current preferences and remains secure.
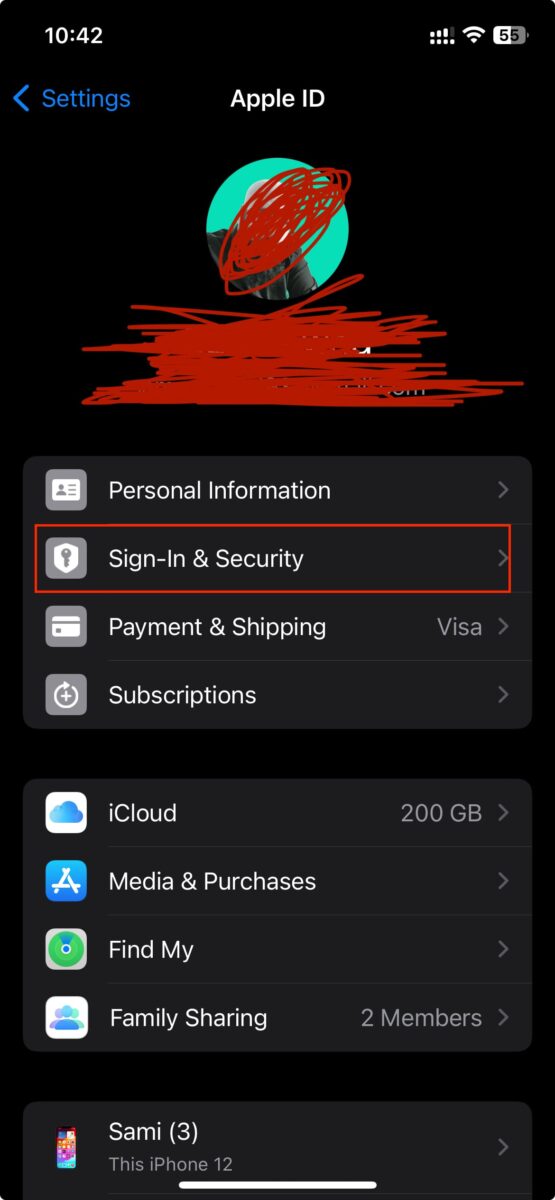
The first step you need to take is to go to the Settings app, tap on your Apple ID picture or name from there.

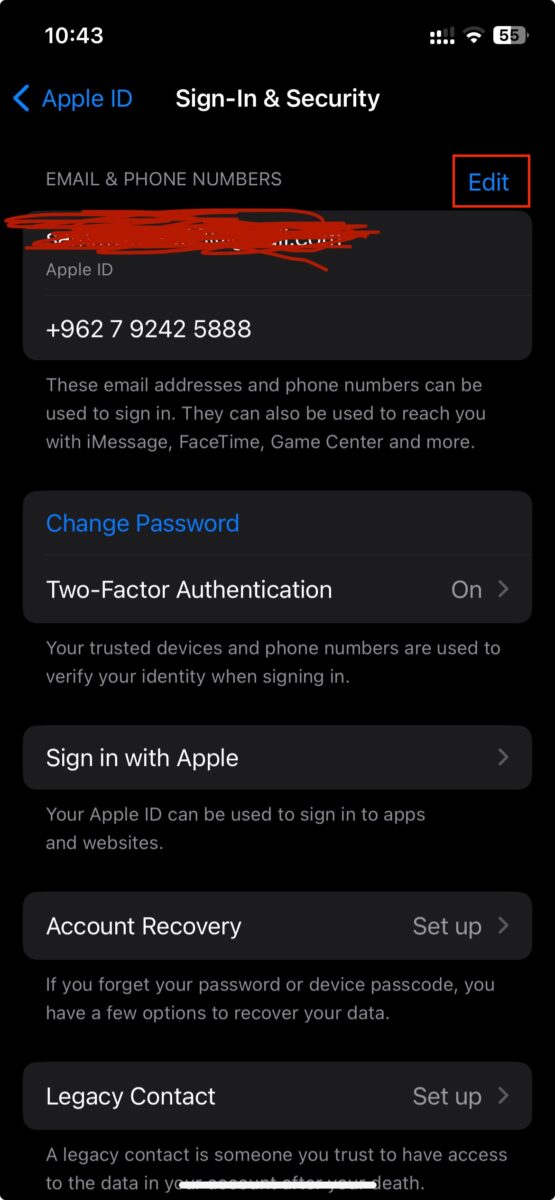
- Tap on Sign-In & Security.
- Click on Edit.
- Click on the red icon.
- Click on the Delete button.
- From the dialog box, click on Choose Another Email.
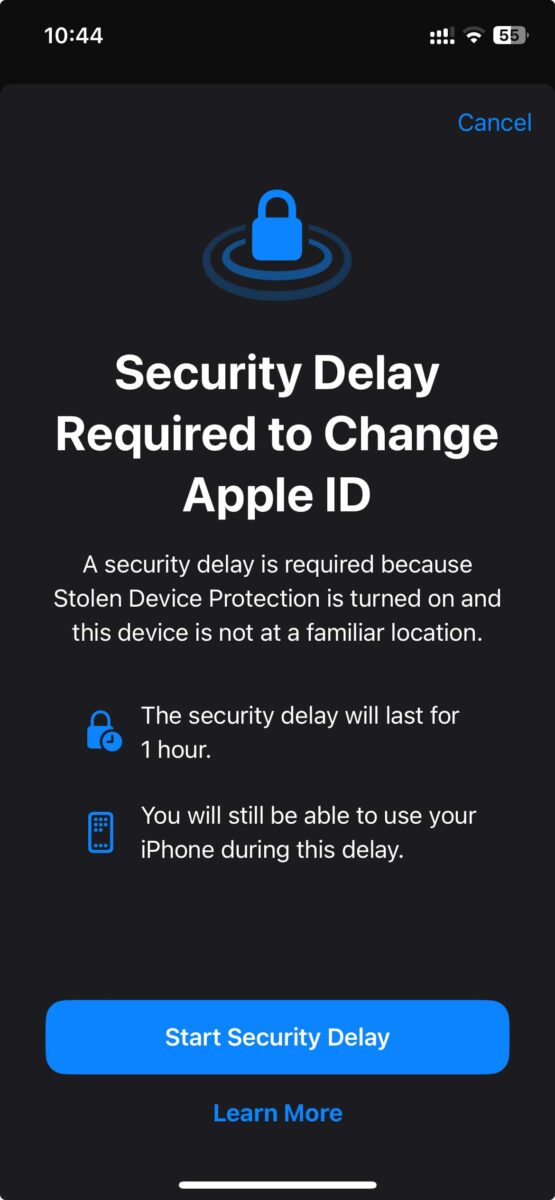
- You will be prompted to Face ID.
- Once your face is verified, a dialog box saying that a 1-hour security delay needs to be activated before changing your email.
- Click on the Start Security Delay button.
- After an hour passes, you will receive a notification.
- Click on the notification.
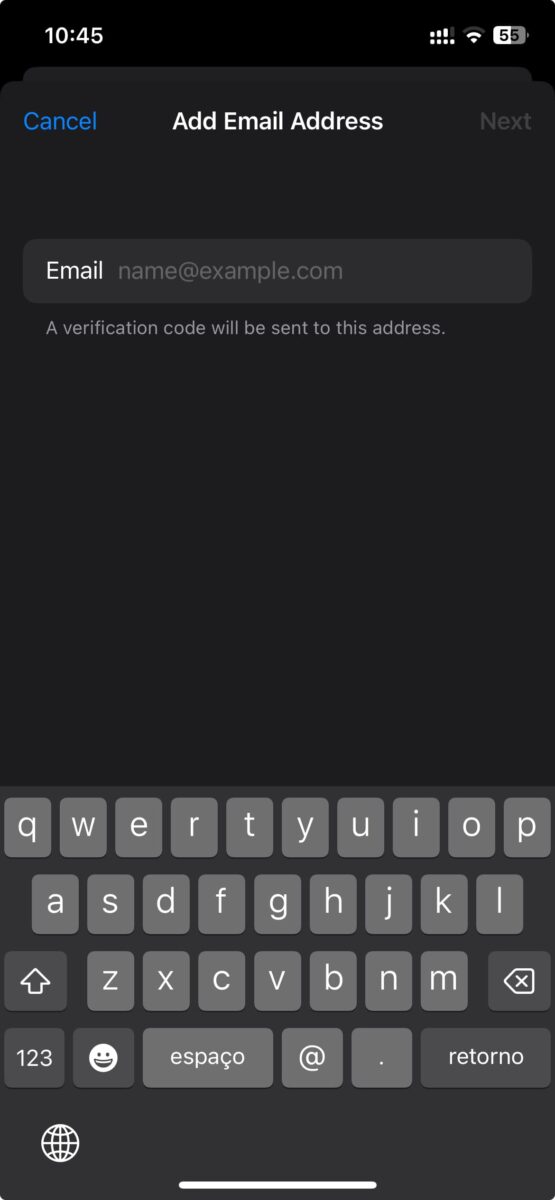
- You will be prompted to enter the new email address.
- Write your new email address and click on the Next button.
- You will now receive an OTP in your email.
- Enter the OTP that you received.
Congratulations, you now have a new email address associated with your Apple ID.